
CV 22 min read
SAM3教程:Meta AI最新图像分割模型完全指南|支持400万概念的开放词汇分割
SAM3教程:Meta最新AI图像分割模型完全指南。支持400万+概念的开放词汇分割,文本提示即可精准分割图像视频。包含详细安装步骤、Python代码示例、性能优化技巧。零基础快速上手SAM3模型,提升计算机视觉项目效率。
本文发布于 303 天前,内容可能已过时,请注意甄别。
SAM3 (Segment Anything Model 3) 是 Meta Superintelligence Labs 刚刚推出的革命性开放词汇分割模型。说实话,这个模型真的很厉害——它不仅继承了 SAM2 的强大功能,还首次实现了真正的概念理解能力。
简单来说,SAM3 现在能够“听懂”你的话了!你只需要用自然语言描述一个概念,它就能在图像和视频中找到并分割出来。而且这家伙的“词汇量”特别大——能理解超过 400 万种不同的概念,这种“概念分割”能力可以说是计算机视觉领域的又一次重大突破。
举个例子,你只要说一句“穿白色球衣的球员”,SAM3 就能立马找到并精准分割出所有符合这个描述的人。这种“听得懂人话”的能力,真的是让人印象深刻!
🚀 核心优势
- 开放词汇概念分割:这是第一个真正能“听懂人话”并做分割的模型
- 超大规模概念库:支持 400+ 万种概念,这数量比现有的基准多了足足 50 倍!
- 多模态提示支持:不管你是想用文字、点击还是框选,都没问题
- 接近人类性能:在 SA-Co 测试中能达到人类水平的 75-80%,这个成绩相当不错
- 统一架构设计:检测器和跟踪器各司其职,互不干扰,效率更高
- 存在性判断:这个功能很实用,能准确区分相似概念(比如“红衣球员”vs“白衣球员”)
🏗️ 模型架构
核心组件
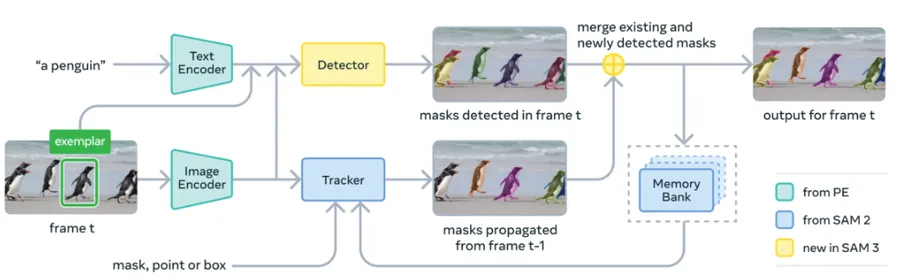
- 共享视觉编码器:检测器和跟踪器共享的高效视觉特征提取器
- DETR 检测器:基于文本、几何和图像示例条件的 DETR 架构检测器
- SAM2 跟踪器:继承 SAM2 的 Transformer 编码器-解码器架构
- 存在令牌:创新的存在性判断机制,提升相似概念区分能力
- 文本编码器:处理自然语言文本提示的语言理解模块
- 多模态融合层:整合视觉和语言特征的跨模态理解组件
工作流程
| 步骤 | 处理阶段 | 主要操作 | 输入类型 | 输出结果 |
|---|---|---|---|---|
| 1 | 概念理解 | 解析文本提示并理解概念语义 | 自然语言文本 | 概念嵌入 |
| 2 | 视觉特征提取 | 共享编码器提取图像/视频特征 | 原始像素数据 | 高维特征图 |
| 3 | 跨模态融合 | 融合视觉特征和文本概念嵌入 | 视觉特征 + 概念嵌入 | 多模态表示 |
| 4 | 对象检测 | DETR 检测器定位匹配概念的对象 | 多模态表示 | 边界框 + 置信度 |
| 5 | 精细分割 | 生成高质量的实例分割掩码 | 检测结果 + 视觉特征 | 分割掩码 |
| 6 | 存在性判断 | 存在令牌判断概念是否真实存在 | 全局特征 | 存在性得分 |
🛠️ 环境安装
系统要求
- 操作系统:Linux、Windows、MacOS
- Python:3.12+
- PyTorch:2.7+
- CUDA:12.6+
- GPU:NVIDIA GPU(推荐 16GB+ 显存,支持 848M 参数模型)
- 内存:32GB+ RAM(推荐)
- 存储空间:至少 50GB 可用空间
1. 创建虚拟环境
       # 创建 Conda 环境(推荐 Python 3.12)
conda create -n sam3 python=3.12
conda deactivate
conda activate sam3
2. 安装 PyTorch
       # 安装 PyTorch 2.7 和 CUDA 12.6 支持
pip install torch==2.7.0 torchvision torchaudio --index-url https://download.pytorch.org/whl/cu126
3. 安装 SAM3
       # 克隆项目仓库
git clone https://github.com/facebookresearch/sam3.git
cd sam3

# 安装 SAM3
pip install -e .

# 安装示例笔记本依赖(可选)
pip install -e ".[notebooks]"

# 安装开发和训练依赖(可选)
pip install -e ".[train,dev]"
4. 获取模型访问权限
特别提醒:SAM3 现在还比较“高冷”,需要先申请权限才能用:
- 访问 SAM3 Hugging Face 仓库
- 申请访问权限并等待审核通过
- 生成 Hugging Face 访问令牌
- 进行身份验证:
       # 安装 huggingface_hub
pip install huggingface_hub

# 登录 Hugging Face
hf auth login
# 输入您的访问令牌
5. 验证安装
       # 验证 PyTorch 和 CUDA 安装
python -c "import torch; print(f'PyTorch: {torch.__version__}'); print(f'CUDA available: {torch.cuda.is_available()}')"

# 验证 SAM3 安装
python -c "from sam3.model_builder import build_sam3_image_model; print('SAM3 安装成功!')"小贴士:
- SAM3 是个“大家伙”(848M 参数),记得准备足够的 GPU 显存哦
- 第一次跑的时候会自动下载模型,可能需要等一会儿
- 网络不给力的话,可以试试配置 Hugging Face 镜像源
🎯 快速开始
图像分割示例
基本文本提示分割
       import torch
from PIL import Image
import matplotlib.pyplot as plt
from sam3.model_builder import build_sam3_image_model
from sam3.model.sam3_image_processor import Sam3Processor

# 加载 SAM3 模型
model = build_sam3_image_model()
processor = Sam3Processor(model)

# 加载图像
image = Image.open("your_image.jpg")
inference_state = processor.set_image(image)

# 这里就是魔法时刻了!用文本描述你想要的东西
text_prompt = "穿白色球衣的球员"  # 你可以随便输入任意概念
output = processor.set_text_prompt(state=inference_state, prompt=text_prompt)

# 获取分割结果
masks = output["masks"]        # 分割掩码
boxes = output["boxes"]        # 边界框
scores = output["scores"]      # 置信度得分

# 显示结果
def show_results(image, masks, boxes, scores, text_prompt):
    fig, axes = plt.subplots(1, len(masks) + 1, figsize=(15, 5))

    # 显示原图
    axes[0].imshow(image)
    axes[0].set_title("原图")
    axes[0].axis('off')

    # 显示各个分割结果
    for i, (mask, box, score) in enumerate(zip(masks, boxes, scores)):
        axes[i+1].imshow(image)
        axes[i+1].imshow(mask, alpha=0.6, cmap='viridis')

        # 绘制边界框
        x1, y1, x2, y2 = box
        rect = plt.Rectangle((x1, y1), x2-x1, y2-y1,
                           fill=False, color='red', linewidth=2)
        axes[i+1].add_patch(rect)

        axes[i+1].set_title(f"得分: {score:.3f}")
        axes[i+1].axis('off')

    plt.suptitle(f'文本提示: "{text_prompt}"', fontsize=16)
    plt.tight_layout()
    plt.show()

show_results(image, masks, boxes, scores, text_prompt)
复杂概念分割示例
       # 来试试更复杂的描述,看看 SAM3 的“理解能力”
complex_prompts = [
    "戴眼镜的人",
    "红色的汽车",
    "在天空中飞翔的鸟",
    "桌子上的笔记本电脑",
    "正在吃草的动物"
]

for prompt in complex_prompts:
    print(f"
正在分割: {prompt}")

    # 重新设置图像状态
    inference_state = processor.set_image(image)

    # 执行分割
    output = processor.set_text_prompt(state=inference_state, prompt=prompt)

    if len(output["masks"]) > 0:
        print(f"哇,找到了 {len(output['masks'])} 个匹配的对象!")
        # 看看最佳结果的得分
        best_idx = output["scores"].argmax()
        print(f"最佳匹配得分: {output['scores'][best_idx]:.3f}(得分越高越准确)")
    else:
        print("嗯,这个没找到匹配的对象")
视频分割示例
       import torch
from sam3.model_builder import build_sam3_video_predictor

# 初始化 SAM3 视频预测器
video_predictor = build_sam3_video_predictor()

# 设置视频路径(可以是 JPEG 文件夹或 MP4 文件)
video_path = "your_video.mp4"  # 或 "./video_frames/" 文件夹

# 启动视频分割会话
response = video_predictor.handle_request(
    request=dict(
        type="start_session",
        resource_path=video_path,
    )
)

session_id = response["session_id"]
print(f"好的,视频会话已经启动了,ID: {session_id}")

# 在指定帧添加文本提示
frame_index = 0  # 选择一帧作为起始帧
text_prompt = "跑步的人"  # 你的文本提示

response = video_predictor.handle_request(
    request=dict(
        type="add_prompt",
        session_id=session_id,
        frame_index=frame_index,
        text=text_prompt,
    )
)

# 获取分割结果
output = response["outputs"]
print(f"在第 {frame_index} 帧找到了 {len(output)} 个匹配的对象")

# 处理每个检测到的对象
for i, obj in enumerate(output):
    object_id = obj["object_id"]
    mask = obj["mask"]
    score = obj["score"]

    print(f"对象 {i+1}: ID={object_id}, 得分={score:.3f}")

    # 保存掩码或进行后续处理
    # mask 是一个 numpy 数组,可以直接使用

# 进行交互式优化(可选)
# 你可以添加点击提示来精细调整结果
refinement_response = video_predictor.handle_request(
    request=dict(
        type="add_point",
        session_id=session_id,
        frame_index=frame_index,
        object_id=output[0]["object_id"],  # 选择第一个对象
        point=[320, 240],  # 点击坐标
        is_positive=True,  # 正面点击(前景)
    )
)

print("好了,视频分割和交互式优化都搞定了!")
批量视频处理
       # 处理多个视频文件
video_files = ["video1.mp4", "video2.mp4", "video3.mp4"]
text_prompts = ["踢球的人", "骑自行车的人", "游泳的人"]

results = []

for video_file, prompt in zip(video_files, text_prompts):
    print(f"
正在处理: {video_file} - '{prompt}'")

    # 启动新会话
    response = video_predictor.handle_request(
        request=dict(
            type="start_session",
            resource_path=video_file,
        )
    )

    session_id = response["session_id"]

    # 添加文本提示
    response = video_predictor.handle_request(
        request=dict(
            type="add_prompt",
            session_id=session_id,
            frame_index=0,
            text=prompt,
        )
    )

    results.append({
        "video": video_file,
        "prompt": prompt,
        "output": response["outputs"]
    })

    print(f"找到 {len(response['outputs'])} 个匹配对象")

print(f"
好啦,批量处理完成!一口气处理了 {len(results)} 个视频")
SAM3 Agent 高级功能
SAM3 还提供了 SAM3 Agent,能够处理更复杂的文本提示:
       from sam3.agent import Sam3Agent

# 初始化 SAM3 Agent
agent = Sam3Agent()

# 加载图像
image = Image.open("complex_scene.jpg")

# 复杂文本提示示例
complex_prompts = [
    "穿着红色上衣并且正在跑步的人",
    "停在路边的蓝色小汽车",
    "坐在公园长椅上看书的女孩",
    "在天空中飞行的白色飞机",
    "正在吃草的黑白相间的奶牛"
]

for prompt in complex_prompts:
    print(f"
处理复杂提示: {prompt}")

    # 使用 Agent 处理复杂提示
    result = agent.segment_with_complex_prompt(image, prompt)

    if result["success"]:
        masks = result["masks"]
        confidence = result["confidence"]
        print(f"成功分割,置信度: {confidence:.3f}")
        print(f"找到 {len(masks)} 个匹配对象")
    else:
        print(f"分割失败: {result['error']}")
🔧 高级功能
1. 多概念同时分割
       # 在同一图像中同时分割多个不同概念
from sam3.model.sam3_image_processor import Sam3Processor

processor = Sam3Processor(build_sam3_image_model())
inference_state = processor.set_image(image)

# 定义多个概念
concepts = [
    "人",
    "汽车",
    "建筑物",
    "树木",
    "动物"
]

all_results = {}

for concept in concepts:
    print(f"正在分割: {concept}")

    # 重新设置状态以避免干扰
    inference_state = processor.set_image(image)

    # 执行分割
    output = processor.set_text_prompt(state=inference_state, prompt=concept)

    all_results[concept] = {
        "masks": output["masks"],
        "boxes": output["boxes"],
        "scores": output["scores"]
    }

    print(f"找到 {len(output['masks'])} 个 {concept} 实例")

# 统一显示所有结果
def show_multi_concept_results(image, results):
    fig, axes = plt.subplots(2, 3, figsize=(18, 12))
    axes = axes.flatten()

    # 显示原图
    axes[0].imshow(image)
    axes[0].set_title("原图")
    axes[0].axis('off')

    # 显示各个概念的分割结果
    for i, (concept, result) in enumerate(results.items()):
        if i >= 5:  # 最多显示5个概念
            break

        axes[i+1].imshow(image)

        # 叠加所有该概念的掩码
        for mask in result["masks"]:
            axes[i+1].imshow(mask, alpha=0.4, cmap='viridis')

        axes[i+1].set_title(f'{concept} ({len(result["masks"])} 个)')
        axes[i+1].axis('off')

    plt.tight_layout()
    plt.show()

show_multi_concept_results(image, all_results)
2. 细粒度概念分割
       # 使用更细粒度的概念描述
fine_grained_prompts = [
    "穿着红色T恤的男人",
    "戴太阳镜的女人",
    "黑色的轿车",
    "白色的小狗",
    "绿色的盆栽植物",
    "蓝色的雨伞"
]

for prompt in fine_grained_prompts:
    print(f"
细粒度分割: {prompt}")

    inference_state = processor.set_image(image)
    output = processor.set_text_prompt(state=inference_state, prompt=prompt)

    if len(output["masks"]) > 0:
        # 获取最佳匹配
        best_idx = output["scores"].argmax()
        best_score = output["scores"][best_idx]

        if best_score > 0.5:  # 设置置信度阈值
            print(f"找到高置信度匹配: {best_score:.3f}")

            # 显示结果
            plt.figure(figsize=(12, 6))

            plt.subplot(1, 2, 1)
            plt.imshow(image)
            plt.title("原图")
            plt.axis('off')

            plt.subplot(1, 2, 2)
            plt.imshow(image)
            plt.imshow(output["masks"][best_idx], alpha=0.6, cmap='viridis')
            plt.title(f'{prompt}\n置信度: {best_score:.3f}')
            plt.axis('off')

            plt.tight_layout()
            plt.show()
        else:
            print(f"低置信度匹配: {best_score:.3f}")
    else:
        print("未找到匹配对象")
3. 存在性判断功能
       # SAM3 的存在性判断功能可以准确判断概念是否在图像中存在

# 测试不同概念的存在性
test_concepts = [
    "狗",           # 可能存在
    "猫",           # 可能存在
    "大象",         # 可能不存在
    "飞机",         # 可能不存在
    "汽车",         # 可能存在
    "龙",           # 不存在(虚构生物)
]

existence_results = []

for concept in test_concepts:
    inference_state = processor.set_image(image)
    output = processor.set_text_prompt(state=inference_state, prompt=concept)

    # 检查是否有高置信度的检测结果
    if len(output["masks"]) > 0:
        max_score = max(output["scores"])
        exists = max_score > 0.3  # 存在性阈值

        existence_results.append({
            "concept": concept,
            "exists": exists,
            "confidence": max_score,
            "count": len(output["masks"])
        })
    else:
        existence_results.append({
            "concept": concept,
            "exists": False,
            "confidence": 0.0,
            "count": 0
        })

# 显示存在性判断结果
print("概念存在性分析:")
print("-" * 50)
for result in existence_results:
    status = "✓ 存在" if result["exists"] else "✗ 不存在"
    print(f"{result['concept']:8} | {status:8} | 置信度: {result['confidence']:.3f} | 数量: {result['count']}")
📊 性能优化
1. SAM3 模型性能概览
模型规格
| 特性 | SAM3 |
|---|---|
| 参数量 | 848M |
| 架构 | 检测器 + 跟踪器 + 共享视觉编码器 |
| 支持概念数量 | 400+ 万种 |
| 推荐 GPU 显存 | 16GB+ |
| 推荐系统内存 | 32GB+ |
性能基准测试结果
图像分割性能:
| 数据集 | 指标 | SAM3 | 人类性能 | 对比模型(最佳) |
|---|---|---|---|---|
| SA-Co/Gold | cgF1 | 54.1 | 72.8 | OWLv2: 24.6 |
| LVIS | cgF1 | 37.2 | - | OWLv2: 29.3 |
| LVIS | AP | 48.5 | - | DINO-X: 38.5 |
| COCO | AP | 56.4 | - | DINO-X: 56.0 |
视频分割性能:
| 数据集 | 指标 | SAM3 | 人类性能 |
|---|---|---|---|
| SA-V test | cgF1 | 30.3 | 53.1 |
| SA-V test | pHOTA | 58.0 | 70.5 |
| YT-Temporal-1B | cgF1 | 50.8 | 71.2 |
| SmartGlasses | cgF1 | 36.4 | 58.5 |
| BURST | HOTA | 44.5 | - |
为什么说 SAM3 厉害:
- 在 SA-Co 测试中能达到人类水平的 75-80%,这个成绩相当不错了
- 概念数量比现有基准多了 50倍,这个跨度可不小
- 在开放词汇分割领域基本是“独孤求败”的存在
2. 推理优化
批量推理优化
SAM3 支持批量处理多个图像,提高处理效率:
       from sam3.model_builder import build_sam3_image_model
from sam3.model.sam3_image_processor import Sam3Processor
import torch

# 初始化模型
model = build_sam3_image_model()
processor = Sam3Processor(model)

# 批量处理示例
def batch_inference(images, prompts, batch_size=4):
    """
    批量处理多个图像和提示
    """
    results = []

    for i in range(0, len(images), batch_size):
        batch_images = images[i:i+batch_size]
        batch_prompts = prompts[i:i+batch_size]

        batch_results = []

        with torch.no_grad():  # 禁用梯度计算节省内存
            for image, prompt in zip(batch_images, batch_prompts):
                inference_state = processor.set_image(image)
                output = processor.set_text_prompt(
                    state=inference_state,
                    prompt=prompt
                )
                batch_results.append(output)

        results.extend(batch_results)

        # 清理 GPU 内存
        torch.cuda.empty_cache()

    return results

# 使用示例
images = [Image.open(f"image_{i}.jpg") for i in range(10)]
prompts = ["人", "汽车", "建筑", "动物", "植物"] * 2

results = batch_inference(images, prompts, batch_size=2)
print(f"搞定!批量处理完成,一口气处理了 {len(results)} 个任务")
内存优化
       # 内存优化策略
import gc

def memory_efficient_inference(image, prompt):
    """
    内存优化的推理方法
    """
    try:
        # 清理之前的内存
        torch.cuda.empty_cache()
        gc.collect()

        # 执行推理
        with torch.no_grad():
            inference_state = processor.set_image(image)
            output = processor.set_text_prompt(
                state=inference_state,
                prompt=prompt
            )

        return output

    finally:
        # 确保清理内存
        torch.cuda.empty_cache()
        gc.collect()

# 使用示例
result = memory_efficient_inference(image, "穿红色衣服的人")
性能监控
       def monitor_performance():
    """
    监控 SAM3 性能指标
    """
    import psutil
    import time

    # GPU 内存使用情况
    if torch.cuda.is_available():
        gpu_memory = torch.cuda.get_device_properties(0).total_memory
        gpu_allocated = torch.cuda.memory_allocated(0)
        gpu_cached = torch.cuda.memory_reserved(0)

        print(f"GPU 总内存: {gpu_memory / 1e9:.1f} GB")
        print(f"GPU 已分配: {gpu_allocated / 1e9:.1f} GB")
        print(f"GPU 缓存: {gpu_cached / 1e9:.1f} GB")

    # 系统内存使用情况
    memory = psutil.virtual_memory()
    print(f"系统内存使用率: {memory.percent}%")
    print(f"可用内存: {memory.available / 1e9:.1f} GB")
性能测试
       def benchmark_sam3(test_images, test_prompts, num_runs=10):
    """
    SAM3 性能基准测试
    """
    import time

    times = []

    for i in range(num_runs):
        start_time = time.time()

        for image, prompt in zip(test_images, test_prompts):
            inference_state = processor.set_image(image)
            output = processor.set_text_prompt(
                state=inference_state,
                prompt=prompt
            )

        end_time = time.time()
        times.append(end_time - start_time)

    avg_time = sum(times) / len(times)
    throughput = len(test_images) / avg_time

    print(f"平均处理时间: {avg_time:.3f}s")
    print(f"处理速度: {throughput:.1f} images/s")

    return avg_time, throughput
3. 内存优化
       # 对于长视频,使用内存优化策略
def process_long_video(video_frames, max_frames_in_memory=50):
    """处理长视频的内存优化方案"""
    total_frames = len(video_frames)
    results = {}

    for start_idx in range(0, total_frames, max_frames_in_memory):
        end_idx = min(start_idx + max_frames_in_memory, total_frames)

        # 处理当前批次
        batch_frames = video_frames[start_idx:end_idx]
        batch_results = process_video_batch(batch_frames)

        # 合并结果
        results.update(batch_results)

        # 清理内存
        torch.cuda.empty_cache()

    return results
🔧 故障排除
常见问题
1. CUDA 内存不足
问题:RuntimeError: CUDA out of memory
解决方案:
       # 使用更小的模型
checkpoint = "./checkpoints/sam2_hiera_small.pt"
model_cfg = "sam2_hiera_s.yaml"

# 减少批处理大小
torch.cuda.empty_cache()

# 使用 CPU 推理(较慢但内存需求低)
predictor = SAM2ImagePredictor(
    build_sam2(model_cfg, checkpoint, device="cpu")
)
2. 模型权重下载失败
问题:无法下载模型权重文件
解决方案:
       # 方法1:使用官方下载脚本
cd checkpoints
./download_ckpts.sh

# 方法2:使用 Hugging Face(推荐)
pip install huggingface_hub
python -c "
from sam2.sam2_image_predictor import SAM2ImagePredictor
predictor = SAM2ImagePredictor.from_pretrained('facebook/sam2-hiera-large')
"

# 方法3:手动下载 SAM 2.1 模型
wget https://dl.fbaipublicfiles.com/segment_anything_2/092824/sam2.1_hiera_large.pt

# 方法4:使用代理
export https_proxy=http://your-proxy:port
wget https://dl.fbaipublicfiles.com/segment_anything_2/092824/sam2.1_hiera_large.pt
3. 视频帧处理错误
问题:视频分割时出现帧序列错误
解决方案:
       # 确保视频帧按正确顺序排列
import glob
import re

def natural_sort_key(s):
    """自然排序,正确处理数字序列"""
    return [int(text) if text.isdigit() else text.lower() for text in re.split('([0-9]+)', s)]

# 获取正确排序的帧文件列表
frame_files = glob.glob("video_frames/*.jpg")
frame_files.sort(key=natural_sort_key)

# 验证帧的连续性
for i, frame_file in enumerate(frame_files):
    expected_name = f"frame_{i:06d}.jpg"
    if not frame_file.endswith(expected_name):
        print(f"Warning: Frame sequence may be incorrect at {frame_file}")
4. 分割质量不佳
问题:分割结果不准确或有噪声
解决方案:
       # 1. 调整提示点位置
# 选择对象内部明显特征点,避免边缘区域
input_point = np.array([[object_center_x, object_center_y]])

# 2. 使用多个提示点
input_points = np.array([
    [x1, y1],  # 前景点
    [x2, y2],  # 前景点
    [x3, y3]   # 背景点
])
input_labels = np.array([1, 1, 0])  # 1=前景,0=背景

# 3. 结合边界框提示
masks, _, _ = predictor.predict(
    point_coords=input_points,
    point_labels=input_labels,
    box=bounding_box,
    multimask_output=True,
)

# 选择最佳掩码
best_mask = masks[np.argmax(scores)]
🎨 实际应用案例
1. 视频编辑自动化
       def automatic_video_editing(video_path, target_object_point):
    """自动视频编辑:移除或替换特定对象"""

    # 加载视频帧
    frames = load_video_frames(video_path)

    # 初始化 SAM2
    predictor = build_sam2_video_predictor(model_cfg, checkpoint)
    inference_state = predictor.init_state(video_path=frames)

    # 在第一帧标记目标对象
    predictor.add_new_points(
        inference_state, 0, 1,
        target_object_point, np.array([1])
    )

    # 传播到整个视频
    masks = {}
    for frame_idx, obj_ids, mask_logits in predictor.propagate_in_video(inference_state):
        masks[frame_idx] = (mask_logits[0] > 0.0).cpu().numpy()

    # 应用编辑效果
    edited_frames = []
    for i, frame in enumerate(frames):
        if i in masks:
            # 使用掩码进行对象移除或替换
            edited_frame = apply_inpainting(frame, masks[i])
            edited_frames.append(edited_frame)
        else:
            edited_frames.append(frame)

    return edited_frames
2. 医学图像分析
       def medical_image_segmentation(medical_image, organ_points):
    """医学图像器官分割"""

    predictor.set_image(medical_image)

    # 分割多个器官
    organ_masks = {}
    for organ_name, points in organ_points.items():
        masks, scores, _ = predictor.predict(
            point_coords=np.array(points),
            point_labels=np.ones(len(points)),
            multimask_output=False,
        )

        # 后处理:形态学操作
        mask = masks[0]
        mask = cv2.morphologyEx(
            mask.astype(np.uint8),
            cv2.MORPH_CLOSE,
            np.ones((5,5), np.uint8)
        )

        organ_masks[organ_name] = mask

    return organ_masks
3. 电商产品分割
       def product_background_removal(product_image):
    """电商产品背景移除"""

    # 自动检测产品中心点(简化示例)
    h, w = product_image.shape[:2]
    center_point = np.array([[w//2, h//2]])

    predictor.set_image(product_image)
    masks, scores, _ = predictor.predict(
        point_coords=center_point,
        point_labels=np.array([1]),
        multimask_output=True,
    )

    # 选择最大的掩码作为产品掩码
    areas = [np.sum(mask) for mask in masks]
    best_mask = masks[np.argmax(areas)]

    # 创建透明背景图像
    rgba_image = np.zeros((h, w, 4), dtype=np.uint8)
    rgba_image[:, :, :3] = product_image
    rgba_image[:, :, 3] = best_mask * 255

    return rgba_image
📈 性能基准测试
推理速度测试
       import time

def benchmark_sam2():
    """SAM2 性能基准测试"""

    # 测试图像
    test_image = np.random.randint(0, 255, (1024, 1024, 3), dtype=np.uint8)
    test_point = np.array([[512, 512]])
    test_label = np.array([1])

    # 预热
    predictor.set_image(test_image)
    for _ in range(5):
        predictor.predict(
            point_coords=test_point,
            point_labels=test_label,
            multimask_output=False,
        )

    # 正式测试
    times = []
    for _ in range(100):
        start_time = time.time()
        predictor.predict(
            point_coords=test_point,
            point_labels=test_label,
            multimask_output=False,
        )
        end_time = time.time()
        times.append(end_time - start_time)

    avg_time = np.mean(times)
    fps = 1.0 / avg_time

    print(f"平均推理时间: {avg_time:.3f}s")
    print(f"推理速度: {fps:.1f} FPS")

    return avg_time, fps
🤝 社区和资源
学习资源
- 官方论文:SAM 3: Segment Anything with Concepts
- 项目主页:https://ai.meta.com/sam3
- GitHub 仓库:https://github.com/facebookresearch/sam3
- 在线演示:https://segment-anything.com/
- 官方博客:https://ai.meta.com/blog/segment-anything-model-3/
SA-Co 数据集
- SA-Co/Gold:HuggingFace | Roboflow
- SA-Co/Silver:HuggingFace | Roboflow
- SA-Co/VEval:HuggingFace | Roboflow
实用资源
-
Jupyter 示例:
sam3_image_predictor_example.ipynb- 图像分割和文本提示sam3_video_predictor_example.ipynb- 视频分割和交互优化sam3_image_batched_inference.ipynb- 批量推理示例sam3_agent.ipynb- SAM3 Agent 复杂提示处理
-
Hugging Face 模型:
- facebook/sam3 - 主模型(需申请访问权限)
开发资源
- 格式化代码:
ufmt format . - 开发环境:
pip install -e ".[dev,train]" - 贡献指南:CONTRIBUTING.md
获取帮助
- GitHub Issues:https://github.com/facebookresearch/sam3/issues
- 模型访问:通过 Hugging Face 申请
- 许可证:SAM License - 查看 LICENSE
更多文章

ZCode 说只是做索引,可它翻开的不止当前代码

OpenClaw 2.0 发布:Agent 终于能把没做完的事接着做
“牛来”揭面:智谱 GLM-5.3-Flash 匿名期跑出 44 万亿 Token
GLM-5.3 发布:基座没换,智谱把后训练推到数十倍任务环境

DeepSeek Harness 开源:把 Agent 的整套运行底座拆开了
FFmpeg 9.0 “Lei” 发布:这个版本号,纪念一位中国音视频开发者
DeepSeek-V4-Flash 正式上线:性能超过 GLM,逼近 Opus 4.8,价格更狠
GPT-5.6 Luna 直接降价 80%:百万 Token 输出只要 1.2 美元
Kimi K3 真开源了:2.8T 模型如何只激活 104B 参数?
相关文章
暂无相关文章